Blog

Author Archive

Use of Silicone Cups for Self-Myofascial Release

Posted on: April 1st, 2016 by Movement Sports Clinic No Comments

by Louise Taylor

Silicone Cups

Silicone cups can help improve circulation, release fascia and relax muscles. Select the size of cup that best matches the size of the area you want to release. Choose a larger cup for an area like the thigh and back and smaller one for the forearm or foot.

cups-self-myfascial-release

Apply light massage oil or lotion to the treatment area. Secure cup to the skin by squeezing or pressing on the cup to create the negative pressure required to create a seal. Once the right pressure is obtained, slide the cup back and forth, push and pull it or leave it in place for up to three minutes to provide deep stimulation to the underlying tissue.

Caution

Care must be taken to prevent over stimulation of the tissues. Gentle redness will occur and is desirable as a sign of increased circulation. Often a red speckled appearance or bruise can develop which indicates tightness of tissue beneath. While the bruising can be therapeutic you must let the skin restore itself for a few days before continuing to cup.

Cupping on the face is not recommended and should be done with care as the facial tissues are more sensitive. Leave on for no longer than 30 seconds.

Contraindications

Do not cup over bleeding or infected areas, dermatitis or injured skin

Do not use if you have a bleeding disorder like hemophilia or leukaemia

Do not use over the abdomen during pregnancy

If you are suffering from chronic disease like congestive heart failure, renal failure or peripheral edema, do not use cupping therapy

Do not cup over the eye, ear, nose, mouth, nipple, genitals as areas of superficial arteries like the neck.

Cleaning and Disinfecting

Medical grade silicone cups are safe, hygienic and resilient. To clean, wash in hot water with dish soap or an antibacterial soap. After washing, the cups can be wiped with alcohol or placed in boiling water for two to three minutes. Silicone cups are also dishwasher safe.

Service Life

High quality silicone cups can last up to five years. The cup may become discoloured over time, but this does not impact its function. When suction is no longer easily attained, the cup edges have deteriorated and it is time for replacement.

Any questions please ask your therapist or email us or leave a reply below.

What is Myofascial Cupping?

Posted on: March 16th, 2016 by Movement Sports Clinic No Comments

BY ROBIN ADAIR, RMT

What is Myofascial Cupping?

It is a direct focus on the Fascial system, with the intent to have a soft tissue change and release, with a person going from dis-function to function.

Myofascial CuppingIt is a hybrid between traditional cupping and myofascial release. There is compression from the rims of the cups, however the principal intent is the Negative pressure. The cups lift and separate, where most other forms of massage use pressure. This Passive soft tissue stretch, with the lifting and separating, makes for one of the best ways to passively stretch fascia. Myofascial Cupping across tissues increases nutrient rich blood to the area. It also brings reduction of the sympathetic nervous system due to the negative pressure. Fascia could be likened to plastic wrap surrounding the body; holding organs, joints, and muscles together. Challenges to the fascia can be brought on from surgical incisions, history of soft tissue injuries, misalignment of joints over a period of time, repetitive strain, just a few examples.

Cupping related to the hydration of fascia?

It triggers the body to rehydrate fascia to optimum levels while squeezing the fluids out of the fascia. Also, when dealing with trigger points, the cups are much less invasive and painful than using fingers and elbows, yet just as effective.

If you are interested in trying Myofascial Cupping let us know at your next appointment!

Questions?
Please contact us.

The Hip ­- A review of hip mechanics, functional movement patterns and treatment

Posted on: February 26th, 2016 by Movement Sports Clinic No Comments

Health and Fitness Consultants Meet Up

With Louise Taylor and Tyson Plesuk

An evening of education, massage and pizza!

On Wednesday February 3rd we brought a group of Calgary health and fitness professionals together to discuss the hip and its relationship to injury and athletic function. Mount Royal University students attended to give free table massage and CocoBrooks supplied us with a delicious assortment of pizza. This session had both a lecture, practical and discussion components. Thank you to all who attended this event!

hip-image1
hip-image2
hip-image3
hip-image4
hip-image5

If you are interested in attending one of our events in the future, please email us at info@movementsportsclinic.ca and we will add you to our contact list.
Please find below a reference list on the presentation.

The Functional Hip 
Movement Sports Clinic Meet Up
February 3, 2016

Reference List

Lenhart et al. Hip Muscle Loads During Running at Various Step Rates
Journal of Orthopaedic & Sports Physical Therapy. October 2014:Vol 44,No 10

Kang et al. Modifying the hip abduction angle during bridging exercise can facilitate gluteus maximus activity. Manual Therapy Jan 2016

Mills et al. Effect of restricted hip flexor muscle length on hip extensor muscle activity and lower extremity biomechanics in college aged female soccer players. The International Journal of Sports Physical Therapy. Dec 2015: Vol 10, Number 7

Nagano et al. Mechanics of the muscles crossing the hip joint during sprint running. Journal of Sports Sciences, 2014:Vol. 32, No. 18, 1722–1728

Macadam et al. An examination of the gluteal muscle activity associated with dynamic hip abduction and hip external rotation exercise: A Systematic Review. International Journal of Physical Therapy. 2015

Laible et a. Iliopsoas Syndrome in Dancers. Orthopaedic Journal of Sports Medicine January 2013

Munegato et al. Sports hernia and femoroacetabular impingement in
athletes: A systematic review. World Journal of Clinical Cases September. 2013

Hides et al. Activation of the hip adductor muscles varies during a simulated
weight-bearing task. Physical Therapy in Sport. January 2016

Yoo et al. An Appraisal of the Short Lateral Rotators of the Hip Joint. Clinical Anatomy. Vol 28; 2015

Dieterich et al. Differentiation of gluteus medius and minimus activity in weight
bearing and non-weight bearing exercises by M-mode ultrasound
imaging. Manual Therapy Vol 20. 2015

Bolgia et al. Relative electromyographic activity in trunk, hip, and knee muscles during unilateral weight bearing exercises: Implications for rehabilitation. Physiotherapy Theory and Practice. January 2016
Loder et al. The epidemiology and demographics of hip dysplasia. International Scholarly Research Network:

Orthopaedics. 2011

Gray Cook. Movement: Functional Movement Systems.  On Target Publications. 2010

Stuart McGill. Ultimate Back Fitness and Performance.  Backfitpro Inc. Fourth Edition 2009

Shirley Sahrmann. Diagnosis and Treatment of Movement Impairment Syndromes Mosby. 2002

P. Page, C. Frank R Lardner,  Assessment and Treatment of Muscle Imbalance: The Janda Approach. Human Kinetics. 2010

Thomas Meyers. Anatomy Trains, Third Edition. Churchill Livingstone. 2014

Diane Lee. The Pelvic Girdle: An approach to the examination of the lumbopelvic-hip region Third Edition. Churchill Livingstone. 2004

2013 Selective Functional Movement Assessment (SFMA) Seminar Manual info@sfma.com

David Weinstock.  Neurokinetic Therapy: An innovative approach to manual muscle testing North Atlantic Books 2010

Give Stability a ‘Tri’

Posted on: February 11th, 2016 by Movement Sports Clinic No Comments

Stability Exercises for Triathletes

Our joints need to have good mobility to allow us to move, but they also need stability to hold them together under load. For each individual doing a given sport, there is an optimum balance of mobility and stability. Triathletes need to manage the combined movement requirements of three sports. There is always going to be some compromise. The best triathlete in the world is not going to be the greatest swimmer, biker or runner but will be most successful at putting all three together.

Mobility is helpful in the shoulder girdle and ankles for the swim, whereas stability is required in the trunk and hips for managing impact forces on the run and creating propulsion on the bike. Tightness in the calf may help the natural springs of the body to improve efficiency on the run, but if ankle mobility is too restricted then injuries may occur due to altered biomechanics. Knee issues are commonly caused by loss of ankle mobility or poor hip / trunk stability. Shoulder issues often develop because of poor activation of shoulder girdle stabilizers and loss of shoulder joint range of motion.

Who needs to do stability exercises

Each of us is built uniquely, so ideally you want to know your own predispositions for mobility and stability. Repetitive static patterns like sitting posture, computer use as well as repetitive dynamic patterns like swim/bike/run will tend to cause fairly predictable imbalances over time… so most of us could use a tune up. Age changes and injury history can also predispose to asymmetries and stability issues. Also, if you have a very mobile, flexible body type, then stability will likely be of great benefit for moderating the impact forces of running.

Which areas need work

The exercises demonstrated in the No Limits video are common, effective and evidence based ones for introducing stability. Key muscles that are commonly inhibited or weak in triathletes are the lateral hip stabilizers (gluteus medius) the hip extensors (gluteus maximus), the trunk rotational stabilizers (abdominal obliques), the postural back muscles, and the shoulder stabilizers (trapezius, rhomboids and serratus anterior).

When training activation and stability, the goal is not to use high force and speed initially, but to use lower load and control. This means exercises are generally done slowly with either holds or repetitions. The goal is to do the exercises with correct technique and to feel some localized fatigue. Exercises should never be painful to perform. If an exercise is uncomfortable, check technique first. If better form does not help, then abandon the exercise. The pain may be a warning sign of potential injury or altered movement mechanics.

When muscles are very weak, doing fewer repetitions but more often is more effective. When in more of a maintenance mode, two to three times per week is a good plan to keep the body balanced from the rigours of life and training. Doing roughly two to three sets of 10-15 is effective. Spending 15-20 minutes may be all that is needed, but do it regularly.

As you get stronger, degree of difficulty can be increased with working against gravity, narrowing base of support or adding resistance. Stretch tubing like theraband, mini-bands and sport cords are helpful. Progressions can also include hand weights, kettlebells and medicine balls.

Breathing is very important. Breath holding is commonly used as a strategy to seek stability or when we are concentrating on a difficult task. We need to be able to breathe and exercise at the same time or we will tire quickly and lose ability to focus. Breathe in and out slowly using deep breaths that use the diaphragm.

The Exercises

The Bridge: This exercise is good for gluteus maximus activation and hip extension. The focus is on using the buttock to lift hips, not the back or hamstrings. This area is commonly weak in many of us due to time spent sitting, poor posture and minimal use of deep squatting activities in our first world lifestyle.

The Clamshell: This is a key pattern for gluteus medius activation and hip abduction /external
rotation. The focus is on using the lateral hip muscles to lift the leg. Work hard to stop the back from twisting in this exercise. Gluteus medius is known as ‘the walk’ muscle as it is needed to help hold the body upright on the single stance leg.

Dead Bug: This movement helps to activate the front trunk stabilizers like transversus abdominus and obliques. Moving arms and legs around a stable core is of fundamental importance for core stability and very relevant for a triathlete.

Bird Dog: Known as a safe and effective way to activate the back muscles, the bird dog uses a four point kneeling base to move the legs and arms on the diagonal. Like the dead bug it uses the natural spiral slings in the body to stabilize the trunk.

A, T, W, Y: This ‘alphabet’ exercise engages the stabilizer muscles around the shoulder girdle. Done in a face down position on the ball, ATWY positions activate the rhomboids, upper, middle and lower fibres of trapezius.

Squats: Ability to deep squat to at least 90 degrees’ knee flexion, with holding the trunk up and arms overhead is a benchmark sign of good joint mobility and trunk stability. Inability to perform the squat pattern is cause for evaluation. Sometimes it is simply a matter of stiff ankles (common in runners) that makes squatting difficult, and sometimes it is lack of trunk stability.

Stir the Pot: Done on the fit ball, this exercise pulls together use of trunk stabilizers with a shoulder control movement. Stirring the Pot is challenging, but can be used as a benchmark for trunk and shoulder stability. The exercise activates the lats, serratus anterior as well as front and back trunk stabilizers

Side Plank: A good exercise for the lateral chain of muscles, the side plank activates the obliques, gluteus medius and shoulder girdle stabilizers. Adding leg raises is a great progression for gluteus medius stability control.

Here are variations/progressions for some of the above exercises:

Winter Warm Up

Posted on: November 24th, 2015 by Movement Sports Clinic No Comments

Winter Warm-Up
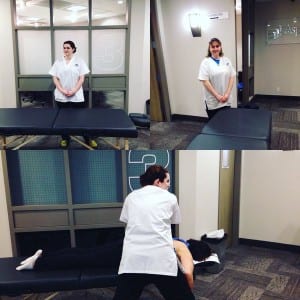
Stepping out into frigid temperatures with cold, tight muscles never feels that good and could be putting you at risk. Whether you are a winter runner, a cross-country skier, alpine skier, or bobsledder a proper warm-up is critical for optimal performance and injury prevention. If you are not currently using a warm up before sport participation or races, here are some points to consider.

Why Bother?
Aerobic warm up promotes blood circulation to the muscles for optimum oxygen delivery and energy metabolism. Raising the heart rate helps warms up the core and peripheral body temperature to make soft tissues more resilient and pliable. Lubrication of the joint surfaces through dynamic range of motion exercises decreases resistance and improves sport specific mobility. Practicing muscle recruitment patterns that are sport specific will prime the nervous system to help coordination of complex, powerful or quick movements. Progressive loading of tissues by gradually adding speed or resistance prepares the tissues to handle forces safely. Canada One bobsled pilot Justin Kripps understands the importance of a proper warm-up and said “I perform a series of muscle activation exercises in my warm up that have almost completely relieved my chronic Achilles tendonosis”.

Getting your body into the sport groove physically can also help prepare you mentally by clearing the head of distractions and helping achieve focus.

How Long Does it Take?
Professional athletes take their warm-ups seriously. Before a bobsled race, athletes will spend 30-45 minutes warming up to prepare to push a 465 lb sled for 5 seconds over 50 meters, before jumping into the sled and sliding down the track at speeds of 140 kilometers per hour!

Recreational athletes commonly warm up on the go with lighter exercise building into more strenuous activity. It will take most athletes between ten to twenty minutes of movement activity to physically heat up and be ready for higher level performance. Even if you are limited for time, taking an extra five minutes for more sport specific exercises on top of aerobic warm up will have a positive impact. In general, the longer or less intense the exercise session, the shorter the warm up necessary to be useful. The goal is not to be fatigued after warm up but ready to go.

What Do I Need to Do?
After heating up the body with some form of aerobic activity, the warm-up should include movements that activate the neuromuscular system. This means tuning up the nerve to muscle communication by stimulating muscles that may be slow to respond or that are about to be used at a high intensity. Depending on the sport’s requirement, you may need to start slowly and then build speed or power production in a controlled fashion. For mobility, it is recommended to perform dynamic, not static stretching. Dynamic stretching integrates sport specific muscle patterns using movement rather than holding a stretch for a prolonged time. The Hip Swing exercise seen later in this article is an example of a dynamic stretch.

The Routine
A warm-up routine should be individualized based on the sport requirements. The following images demonstrate five keys movements that will help prepare the body and activate key muscles for your winter activities.

Do the exercises in a non-stop sequence to maintain your core temperature and prepare your body and muscles for activity. Exercises can be done inside or outside. If done inside, ensure that you do not overheat before going outdoors.

1) Aerobic Warm Up
Jog or skip for five to ten minutes to increase the heart rate and raise the core body temperature. If you will be running on icy surfaces, consider using products like micro-spikes for better traction and safety. Most running and sport stores carry specific footwear or devices to put over the sole like Kahtoola Nanospikes and Yaktrax Run.

2) Squats
Place a mini-band or Theraband loop above your knees. The band will act to drive your knees inwards, which will force you to use your hip abductors, the major hip stabilizers, to push the band outwards. To increase the difficulty and to challenge your balance, try squatting on one leg.
Start slowly and gradually increase the speed of the squat.
Do 5-10 repetitions.

Key points:
Sit back as you squat to try to activate your posterior chain of muscle including the gluteals and hamstrings.

3) Three Way Hip Activation
With a mini-band or Theraband around your ankles, stretch the band apart in three separate directions:

i) Turn your hip inward and stretch band to the front at a 45 degree angle
ii) Turn your hip outward and pull back at a 45 degrees angle
iii) Extend your hip straight back, ensuring you do not over arch your lower back

Do 5 to 10 repetitions. Repeat enough times to notice the muscles around your hip working, but not so much that you feel fatigue.

Key points:
Keep you pelvis square and level during the exercise
Keep your knee extended on the leg that you are pulling with to ensure optimal contraction of your hip musculature and not overuse the hamstrings.

4) Bird Dog
In a hands and knees position, engage your core muscles and extend the opposite arm and leg and hold the position for 5 seconds

To increase the difficulty, try using a Theraband or sport cord, or try this exercise with your knees off the ground (on toes).
Do 10-15 repetitions each side.

Key Points:
Keep a neutral lower back and neck
Think about squeezing your gluteal muscles when you extend your leg backward
Push your fingers forward with the thumb turned upward and push the heel backward with toes toward the floor

5) Hip Swings: Hip Adduction/Abduction and Hip Flexion/Extension
While holding on to a wall, bench or post, swing your legs side-to-side and forward and back. Swing 10-20 times in each direction for each side.

Key points:
While swinging your legs, maintain a neutral spine, tighten your core and ensure you do not over-extend or over-flex your lower back.

References available on request.

Tyson Plesuk and Louise Taylor

For further information or questions, feel free to email tyson@movementsportsclinic.ca or louise@movementsportsclinic.ca

You Were Born to Move!

Posted on: October 28th, 2015 by Movement Sports Clinic No Comments

You Were Born to Move! Physiotherapy Alberta is proud to introduce Born to Move. Over 2,600 Alberta physiotherapists were born to help you move.

See more at: http://www.physiotherapyalberta.ca/#sthash.YE0QyWck.dpuf


BOOK APPOINTMENT ONLINE

Book Online

Or Call Us At 587-318-1600

APPOINTMENTS AVAILABLE WITHIN 24 HOURS!

Back to top